File preparation mistakes delay more book printing projects than any other factor, typically adding 1-4 weeks to production timelines when corrections are required. The most common errors—wrong color mode, insufficient resolution, missing bleed, incorrect dimensions, and font problems—are entirely preventable when authors understand printer requirements before finalizing files. Authors who submit properly prepared files receive proofs faster, approve production sooner, and hold finished books in their hands weeks ahead of those whose files require rework.
Every week, our pre-press team reviews files that need correction before printing can begin. The delays aren’t malicious—they result from authors and designers who simply didn’t know what professional offset printing requires. A cover designed at 72 DPI looks perfect on screen but prints as a blurry mess. An interior formatted in RGB color shifts unexpectedly when converted to CMYK. Illustrations that stop exactly at the trim line leave white edges when pages are cut.
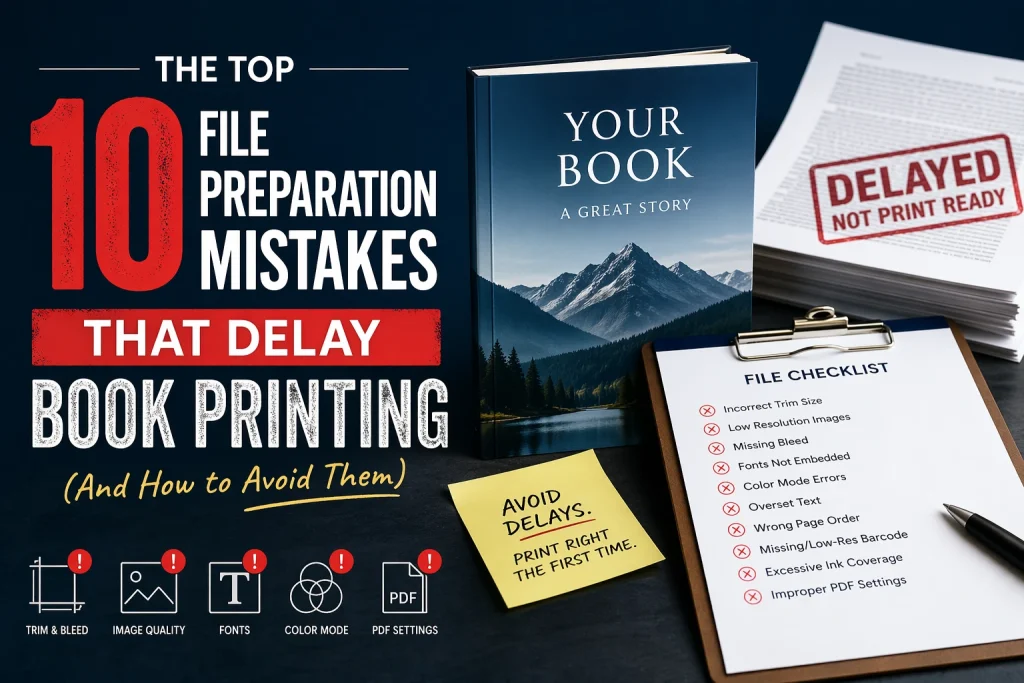
This guide identifies the ten most common file preparation mistakes we see at PRC Book Printing and explains exactly how to avoid each one. With over 30 years of combined experience helping authors prepare files correctly, our team has encountered every possible error—and knows the solutions that prevent delays and deliver beautiful results.
What You’ll Learn
- Why File Preparation Errors Cause Costly Delays
- The 10 Most Common File Preparation Mistakes
- File Preparation Checklist for Error-Free Submission
- Expert Tips from PRC Book Printing
- Frequently Asked Questions
- Next Steps: Submit Print-Ready Files
Why File Preparation Errors Cause Costly Delays
File errors create a cascade of delays that push back your delivery date:
- Discovery phase: Your printer’s pre-press team identifies problems during file review
- Communication phase: Printer notifies you of specific issues requiring correction
- Correction phase: You or your designer fixes the problems
- Resubmission phase: Corrected files are uploaded and reviewed again
- Verification phase: Pre-press confirms corrections resolved all issues
Each cycle through this process adds days to your timeline. Complex errors requiring multiple rounds of correction can add weeks. Meanwhile, your production slot may pass to other projects, pushing your books further back in the queue.
The frustration compounds because these delays are preventable. Every mistake on this list has a straightforward solution—but only if you know about it before submitting files, not after.
The 10 Most Common File Preparation Mistakes
Mistake #1: Submitting Files in RGB Color Mode Instead of CMYK
The Problem:
RGB (Red, Green, Blue) is how screens display color. CMYK (Cyan, Magenta, Yellow, Black) is how professional printing creates color. When RGB files are converted to CMYK for printing, colors shift—sometimes dramatically. Vibrant blues become dull, electric oranges turn muddy, and saturated purples shift toward unexpected hues.
Why It Happens:
Design software defaults to RGB because most design work displays on screens. Designers working primarily in digital or web contexts may never encounter CMYK requirements. Authors receiving files from illustrators or cover designers often don’t know to ask about color mode.
How to Avoid It:
- Request CMYK files specifically from designers and illustrators
- Check color mode before submitting: In Photoshop, Image > Mode should show “CMYK Color”
- For PDFs, document properties typically display color space information
- If conversion is necessary, perform it yourself so you can evaluate and adjust color shifts before submission
Mistake #2: Insufficient Image Resolution (Below 300 DPI)
The Problem:
Images at 72-150 DPI look fine on screens but print with visible pixelation, blur, and quality degradation. The crisp cover that looked professional on your monitor appears amateurish in print.
Why It Happens:
Web and screen graphics use 72-150 DPI because higher resolution provides no visible benefit on monitors. Designers accustomed to digital work may create at screen resolutions without considering print requirements. Authors sometimes download images from websites or use phone photos without checking resolution.
How to Avoid It:
- Require 300 DPI at final print size for all images
- Check resolution before submission: In Photoshop, Image > Image Size shows pixels per inch
- Calculate required pixels: An 8″ × 10″ image needs 2400 × 3000 pixels minimum
- Never upscale low-resolution images—enlarging doesn’t add detail, only blur
- Source images from photographers and illustrators at print resolution from the start
Mistake #3: Missing or Incorrect Bleed
The Problem:
Bleed is the portion of artwork extending beyond the trim line, ensuring color extends fully to page edges after cutting. Without bleed, slight cutting variations leave white strips along edges where color should extend to trim. With incorrect bleed, printers must either crop into artwork or accept unprofessional white edges.
Why It Happens:
Authors unfamiliar with print production don’t know bleed exists. Designers may understand bleed conceptually but execute it incorrectly—creating artwork at exact trim size, adding bleed to some pages but not others, or including bleed on interior pages that shouldn’t have it.
How to Avoid It:
- Standard bleed is 0.125″ (1/8 inch) on all trimmed edges
- For an 8″ × 10″ trim size, artwork should measure 8.25″ × 10.25″
- Bleed applies to covers and any interior pages where color extends to edges
- Interior pages with white margins don’t require bleed
- Request templates from your printer showing exact bleed requirements
Mistake #4: Wrong Trim Size or Dimensions
The Problem:
Files created at incorrect dimensions require redesign before printing. A cover designed for 6″ × 9″ doesn’t fit a 5.5″ × 8.5″ book. Interior pages at the wrong size throw off page count calculations and spine width.
Why It Happens:
Authors change trim size decisions after design begins without updating designers. Designers assume standard sizes without confirming specifications. Communication gaps between author, designer, and printer leave everyone working from different assumptions.
How to Avoid It:
- Finalize trim size before any design work begins
- Confirm trim size with your printer and get their specifications in writing
- Communicate exact dimensions (including bleed) to every member of your production team
- Verify file dimensions before submitting—measure precisely, don’t estimate
Mistake #5: Font Problems (Missing, Unembedded, or Substituted)
The Problem:
Fonts not embedded in PDF files may substitute with different fonts on the printer’s system, changing your book’s appearance—sometimes drastically. A elegant serif becomes a clunky default. Spacing shifts. Page breaks change. Your carefully designed interior becomes something you never approved.
Why It Happens:
PDF export settings may not default to font embedding. Some fonts have licensing restrictions preventing embedding. Designers may not verify font embedding before delivery. Authors may not know to check.
How to Avoid It:
- Always embed fonts when creating PDFs (export settings vary by application)
- Alternatively, outline/convert fonts to paths, which eliminates font files entirely
- Open final PDFs on a different computer to verify fonts display correctly
- Check PDF properties: embedded fonts should show “Embedded” or “Embedded Subset”
- Use standard fonts when possible—unusual fonts create more embedding issues
Mistake #6: Incorrect Spine Width Calculation
The Problem:
Spine width depends on page count and paper stock. A spine designed too narrow leaves gaps; too wide creates overlap. Either looks unprofessional and may prevent proper binding.
Why It Happens:
Authors finalize cover design before interior page count is confirmed. Spine width calculations are performed incorrectly or using wrong paper specifications. Cover designers receive estimated page counts that change before printing.
How to Avoid It:
- Finalize interior page count before calculating spine width
- Get spine width calculation from your printer—they know exact specifications for their paper stocks
- Don’t use generic online calculators; paper weights vary between suppliers
- Design spine artwork last, after all other elements are confirmed
- Request spine width recalculation if page count changes after initial design
Mistake #7: Using Low-Quality Compression (JPEG Artifacts)
The Problem:
JPEG compression creates visible artifacts—blocky areas, color banding, and quality degradation—especially noticeable in gradients, solid colors, and detailed images. These artifacts are permanently baked into files and cannot be removed.
Why It Happens:
Files are saved multiple times as JPEG, compounding quality loss with each save. Low-quality settings are used to reduce file size for email or upload. Source files are discarded, leaving only compressed versions.
How to Avoid It:
- Work in lossless formats (PSD, TIFF, PNG) throughout your workflow
- Save JPEG only as final export at maximum quality settings
- Never re-save an existing JPEG—work from original source files
- Submit PDFs or TIFFs rather than JPEGs when possible
- Keep original, uncompressed source files accessible throughout production
Mistake #8: Ignoring Safe Zone / Live Area
The Problem:
Important content—text, faces, critical illustration elements—placed too close to trim edges may be partially cut off or feel uncomfortably close to the edge. Content near the gutter (center fold) may be lost in the binding.
Why It Happens:
Designers unfamiliar with print constraints don’t account for cutting variation. Authors approve designs on screen without considering physical production tolerances. Gutter requirements for different binding methods aren’t communicated.
How to Avoid It:
- Keep critical content at least 0.25″ (1/4 inch) inside trim edges
- Increase gutter margins for perfect-bound books (0.5″ or more on inside edges)
- Request safe zone specifications from your printer based on your binding method
- Review designs with trim marks visible to verify content placement
- Pay special attention to page numbers, headers, and footers near edges
Mistake #9: Submitting Incorrect File Types or Corrupt Files
The Problem:
Files in unsupported formats require conversion. Native application files (InDesign, Illustrator, Publisher) may not open correctly on the printer’s system. Corrupt files may appear normal on your computer but fail when opened elsewhere.
Why It Happens:
Authors don’t know which file formats printers accept. Designers deliver native files instead of print-ready exports. File transfers corrupt data, especially with large files. Cloud storage syncing creates partial or damaged files.
How to Avoid It:
- Submit high-resolution PDF files (PDF/X-1a or PDF/X-4 for best compatibility)
- TIFF files are universally accepted for images
- Avoid native application files unless your printer specifically requests them
- Verify file integrity by opening submitted files on a different computer
- Use reliable file transfer methods for large files (not email attachments)
- Confirm successful upload by checking file sizes match
Mistake #10: Inconsistent Specifications Across Files
The Problem:
When cover and interior files use different color profiles, resolutions, or specifications, results are unpredictable. Pages may not match in color tone. Some sections print sharply while others appear soft.
Why It Happens:
Different designers work on different parts of the book without coordinating specifications. Files are created at different times with different settings. Authors assemble final submission from multiple sources without verification.
How to Avoid It:
- Establish specifications before any design work begins
- Provide written specifications to everyone creating content
- Verify all files meet identical specifications before submission
- If using multiple designers, designate one to perform final specification check
- Create a specifications document listing color mode, resolution, bleed, trim size, and file format requirements
File Preparation Checklist for Error-Free Submission
Use this checklist to verify your files before submitting to your printer.
Cover File Verification
☐ Color mode: CMYK
☐ Resolution: 300 DPI minimum at final size
☐ Dimensions: Correct trim size plus 0.125″ bleed on all edges
☐ Spine width: Calculated for final page count and paper stock
☐ Fonts: Embedded or outlined
☐ File format: High-resolution PDF (PDF/X-1a or PDF/X-4) or TIFF
☐ Important content: Within safe zone (0.25″ from trim)
☐ Spine text: Properly oriented and readable
☐ Barcode: Included at correct size and placement (if applicable)
☐ File opens correctly: Tested on different computer
Interior File Verification
☐ Color mode: CMYK for color interiors; Grayscale for black-and-white
☐ Resolution: 300 DPI minimum for all images
☐ Dimensions: Correct trim size with appropriate margins
☐ Bleed: Included where color extends to page edges
☐ Fonts: Embedded or outlined
☐ Page count: Divisible by 4 (or as required by printer)
☐ File format: High-resolution PDF or printer-specified format
☐ Gutter margins: Adequate for binding method
☐ Page numbers: Within safe zone
☐ Images: No visible compression artifacts or pixelation
☐ File opens correctly: Tested on different computer
Final Verification
☐ All files use consistent specifications
☐ Cover dimensions match interior trim size
☐ Spine width matches actual page count
☐ Color consistency across cover and interior (if applicable)
☐ File naming is clear and logical
☐ All files included in submission
Expert Tips from PRC Book Printing
Our pre-press team reviews every file before production begins. Here’s what we’ve learned helps authors succeed.
Start Your Printer Conversation Before Design Begins
Contact us before you finalize specifications with your designers. We provide exact requirements for your specific project—trim size options, spine width formulas, bleed specifications, and preferred file formats. Starting with correct specifications eliminates most file problems entirely.
Request Templates
We can provide template files showing trim, bleed, and safe zones for your book specifications. Templates give designers visual guides that communicate requirements more effectively than written descriptions. Many file errors disappear when designers work from proper templates.
Send Test Files Early
After your first chapter or section is designed, submit it for review before completing the entire book. We’ll identify any specification issues while corrections are simple. Discovering problems in 10 pages is far less painful than discovering them in 300.
Don’t Assume—Verify
Open your final files on a different computer before submitting. Verify fonts display correctly, images appear sharp, and colors look as expected. Files that work perfectly on your machine sometimes behave differently elsewhere.
Keep Source Files Accessible
Maintain organized access to original source files throughout production. If corrections are needed, source files make fixes possible. Flattened or compressed finals may not allow adequate correction.
Frequently Asked Questions
What file format should I submit for book printing?
High-resolution PDF files (PDF/X-1a or PDF/X-4) are preferred for both covers and interiors. These formats preserve color accuracy, embed fonts, and maintain print-quality resolution. TIFF files are excellent for images and covers. Avoid JPEG for print submission when possible.
What resolution do my images need?
300 DPI (dots per inch) at the actual size they’ll print. An image printing at 8″ × 10″ needs at least 2400 × 3000 pixels. Lower resolution creates visible pixelation and blur. Higher resolution is fine but provides no additional benefit.
What color mode should my files be in?
CMYK for professional offset printing. RGB files must be converted to CMYK before printing, which causes color shifts. Converting files yourself allows you to evaluate and adjust colors before submission.
What is bleed and how much do I need?
Bleed is artwork extending beyond the trim line, ensuring color reaches page edges after cutting. Standard bleed is 0.125″ (1/8 inch) on all trimmed edges. Your printer can provide exact specifications for your project.
How do I calculate spine width?
Spine width depends on page count and paper stock. Contact your printer for accurate calculation—they know exact specifications for their materials. Generic online calculators may not match your printer’s paper stocks.
What happens if my files have errors?
PRC Book Printing’s pre-press team reviews every file and identifies issues before production. We explain exactly what needs correction in plain language and guide you through fixes. However, corrections take time—preventing errors is always faster than fixing them.
Can I submit native design files (InDesign, Illustrator)?
We prefer high-resolution PDF exports because they maintain consistent appearance across systems. Native files may open differently depending on fonts, linked assets, and software versions. If native files are needed for specific corrections, we’ll request them.
How do I embed fonts in my PDF?
Export settings vary by application. In Adobe InDesign, use Export to PDF (Print) with “Embed All Fonts” selected. In Adobe Illustrator, use Save As PDF with font embedding enabled. Check resulting PDF properties to verify fonts show as “Embedded.”
What safe margins should I use?
Keep important content at least 0.25″ inside trim edges. For perfect-bound books, increase inside (gutter) margins to 0.5″ or more—binding consumes some interior space. Ask your printer for specific recommendations based on your page count and binding method.
How do I avoid JPEG compression artifacts?
Work in lossless formats (PSD, TIFF) throughout your design process. Save JPEG only once, at final export, using maximum quality settings. Never re-save an existing JPEG—quality degrades with each save cycle.
What if my designer doesn’t understand print requirements?
Provide written specifications before work begins. Share this article or our specific requirements document. Request templates from your printer that show trim, bleed, and safe zones visually. If problems persist, consider working with a designer experienced in print production.
Will PRC Book Printing review my files before I commit to printing?
Yes. Our pre-press team reviews every submitted file and identifies any issues before production begins. We explain problems clearly and guide you through corrections. This review happens before you’re charged for production—we want your files right before we print.
Next Steps: Submit Print-Ready Files
Proper file preparation saves time, prevents frustration, and delivers beautiful printed books faster. The ten minutes you invest in verifying specifications prevents ten days of correction delays.
Key Takeaways:
- CMYK color mode and 300 DPI resolution are non-negotiable for professional printing
- Include 0.125″ bleed on all trimmed edges where color extends to the edge
- Embed fonts or convert them to outlines
- Calculate spine width based on final page count and your printer’s paper stock
- Verify all specifications match across cover and interior files
Ready to Submit Your Files?
Contact PRC Book Printing for exact specifications for your project and submit files with confidence. Our pre-press team reviews every submission and identifies any issues before production—guiding you through corrections if needed.
Phone: (888) 659-8320 Email: info@prcbookprinting.com Hours: Monday–Friday, 9:00 AM – 5:00 PM EST
From our Hatboro, Pennsylvania office, PRC Book Printing serves authors nationwide with professional offset printing on Heidelberg presses. Our all-inclusive pricing covers pre-press file review, proofing, printing, binding, and free shipping to all continental US addresses—no hidden fees, no surprise charges.
Submit your files right the first time, and you’ll be holding your finished books weeks sooner.
Written by the PRC Book Printing expert team, professional book manufacturers with over 30 years of combined experience in the printing and publishing industry. Based in Hatboro, Pennsylvania, our team operates industry-leading Heidelberg offset presses and has helped thousands of authors, publishers, and businesses nationwide create exceptional printed books—from hardcover novels to children’s board books, cookbooks to coffee table books.